 | 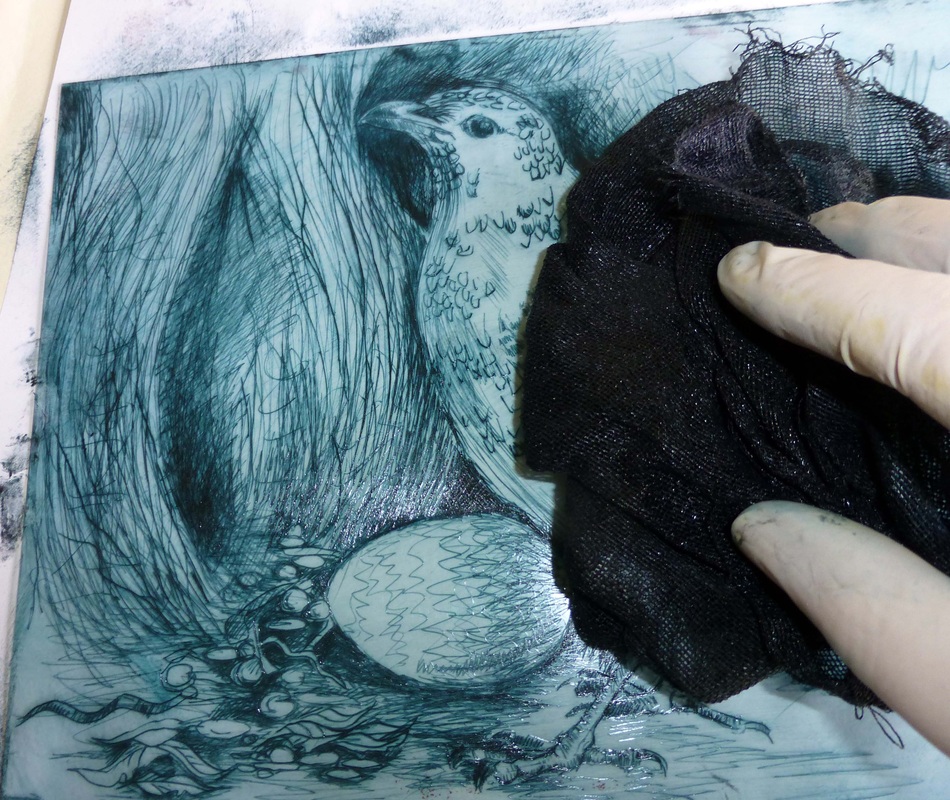 | 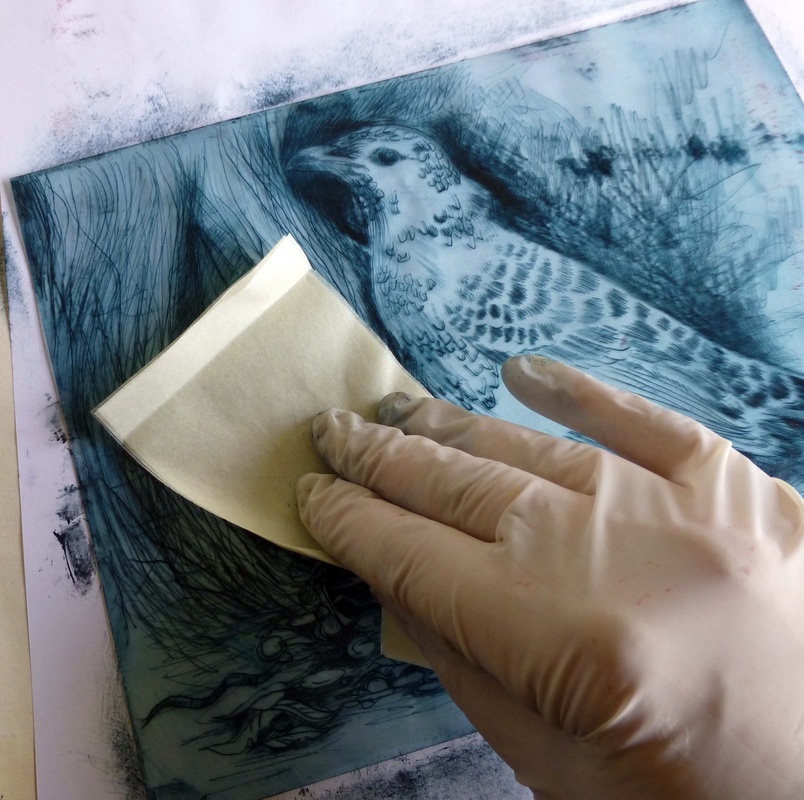 | 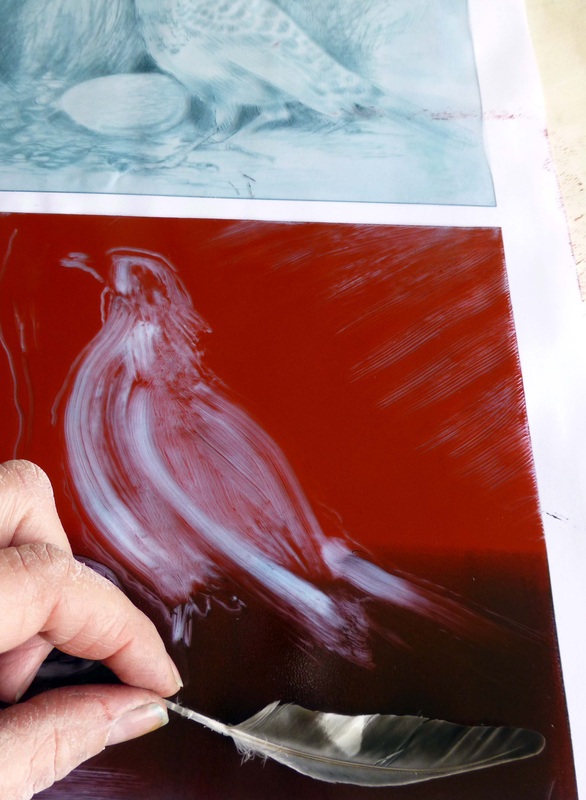 |
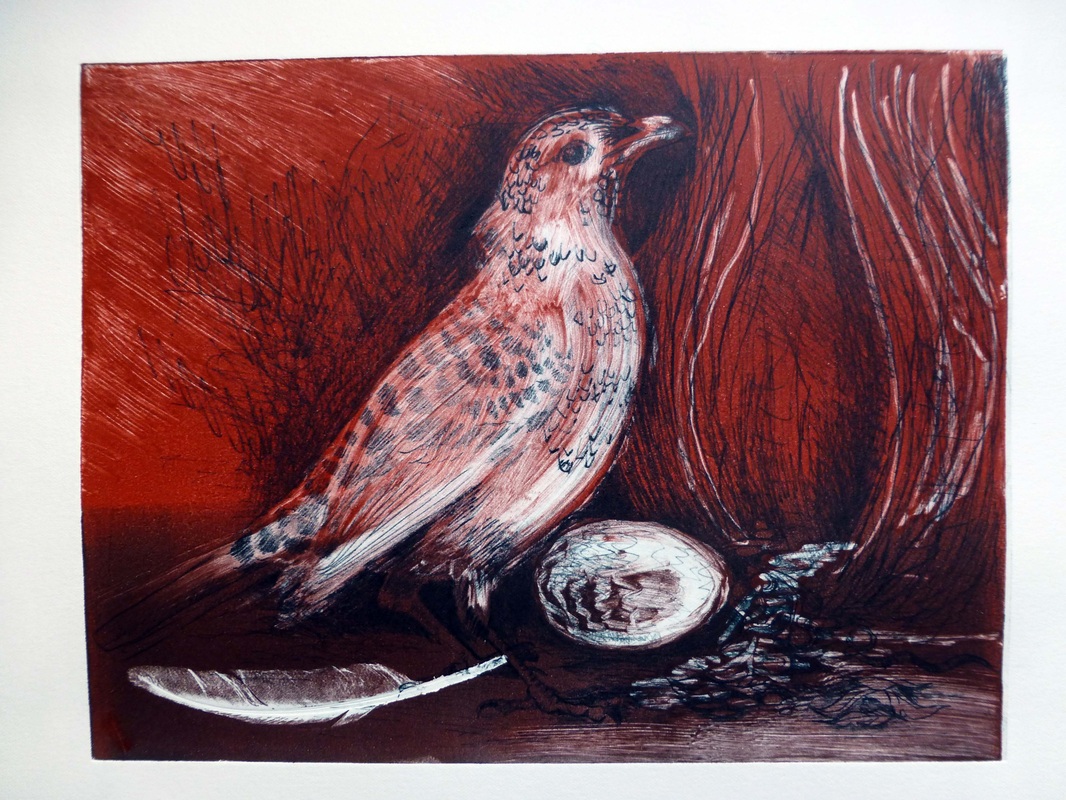
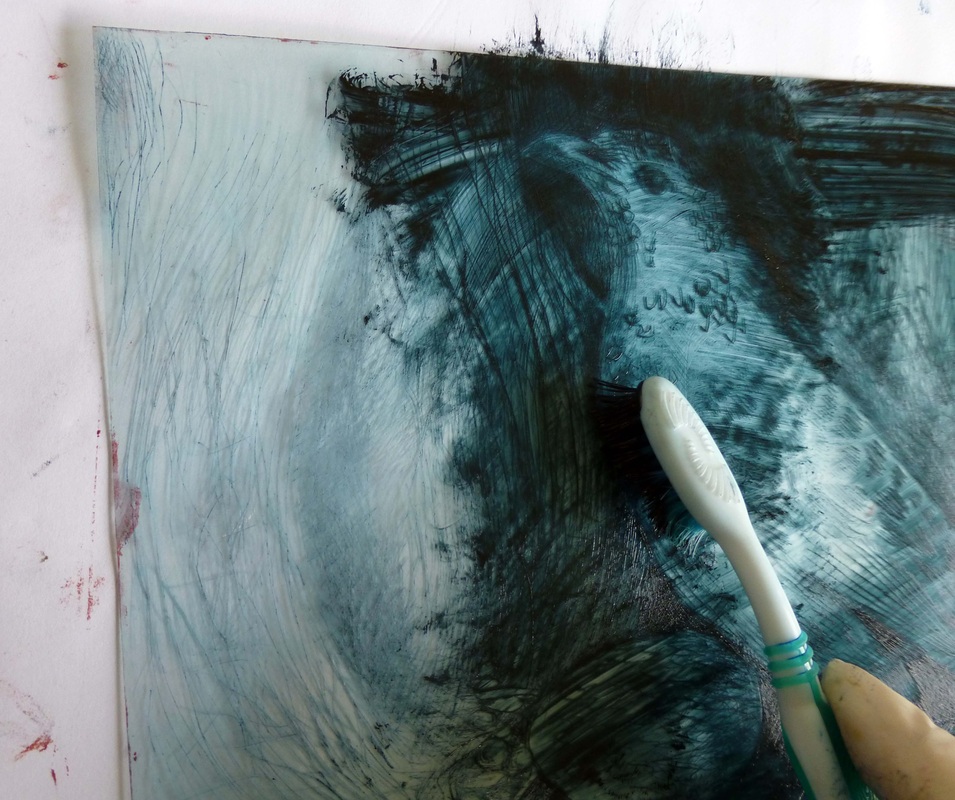
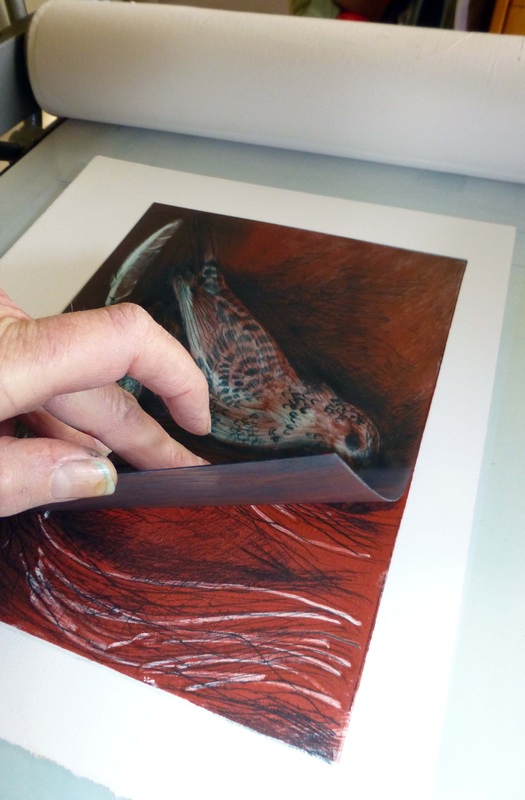 | The use of plastic plates for Drypoint and Monoprint combinations, as demonstrated here, shows how much easier it is to create & line up your two images. Firstly I incised the Bower Bird plate making several proofs along the way to see how the contrasts and line were going to print. It did help to rub a bit of scrap ink into the dry point lines and work over white paper to see the image too. When I was sure of the detail, I then placed my second brown/red ink rolled mono plastic plate over the top of my ink residue drypoint plate of the bird. A light box would be wonderful here but I held it up to the light to see the image underneath. I then used a cotton bud to rub out the silhouette of my bird, egg etc. With a soft cloth and cotton buds I removed the ink within the outline to highlight the main features or make it lighter to create contrast. I printed the mono print background colour plate first and at this stage I placed an actual feather down. Over the resulting mono print colour print, feather removed and while still damp, I placed the inked up Bower Bird Drypoint plate and ran it through the press. This is one of the first prints. I feel I needed to lighten the birds legs & feet but I was pleased with my initial combination print. |
 RSS Feed